Introduction + How to Buy a Domain
In today’s tech-driven world, carving out an online identity is no longer a luxury but a necessity. One of the pivotal steps towards this is securing a domain name and setting up web hosting. Though it might seem daunting initially, this guide promises to simplify the process for you.
Choosing a Domain Name
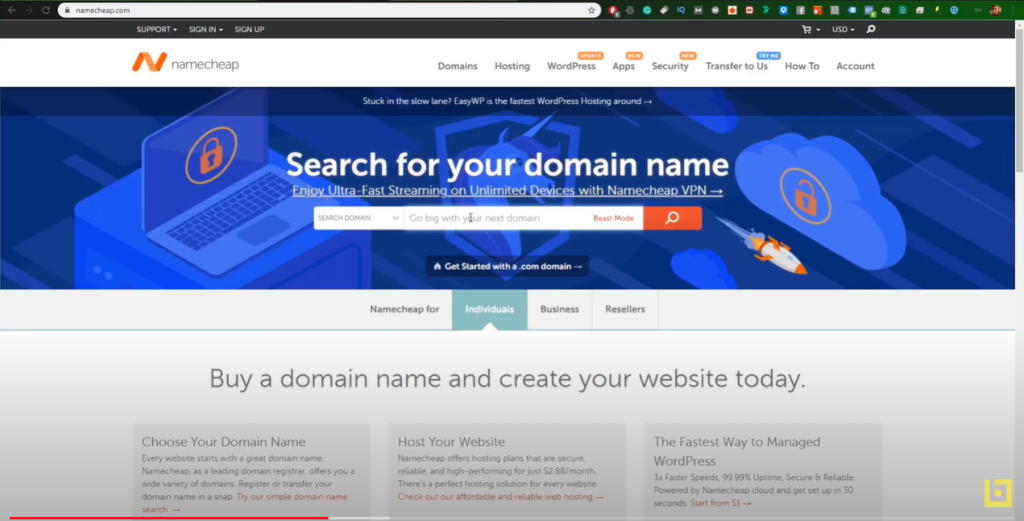
Think of your domain as your online business card. It’s your unique web address, akin to brands like google.com or facebook.com. Before embarking on building your site, it’s crucial to secure an available domain name. Tools like rohost.com or namecheap.com come handy to check the availability of your desired name. Ensure your selected name isn’t already owned by another entity.
Selecting Web Hosting
Once you’ve zeroed in on a domain name, the next step is to choose a hosting service. This is essentially where all your website’s data and pages will reside. While some might prefer buying hosting from their domain provider, exploring other trusted providers is also a viable option. Ensure you opt for a hosting that aligns with your site’s requirements.
Domain Registration and Hosting Setup
With a domain name and hosting service in place, it’s time to get things rolling by registering the domain and configuring the hosting. Each provider will have its own set of instructions, but generally, this involves entering your billing details and selecting the domain’s registration duration. It’s advisable to set up the nameservers (DNS) early on to prevent potential glitches later.
Wrapping Up the Process
Upon completing the domain purchase and hosting configuration, your domain should be all set. Depending on your provider, there might be a short waiting period for the changes to take effect. In the meantime, it’s an excellent opportunity to start fleshing out your site’s content.
In essence, while buying a domain and setting up hosting might seem intricate, it’s a straightforward yet crucial step for any online endeavor. With patience and a keen eye for detail, you’ll have your site up and running in no time.
Setting Up Your Web Hosting
Establishing an online domain and tailoring it with a hosting service is foundational to launching your online footprint. Let’s dive into the nitty-gritty of making this happen seamlessly.
Registering Your Domain
Kickstarting this process is selecting and registering a web domain. It stands as your online badge of identity, a distinct name representing your website. Numerous domain registrars abound, with some offering domain extensions specific to your home country.
Picking a Hosting Service
With your domain in the bag, the next move is choosing a hosting service. Think of hosting as the digital real estate where your website’s data nestles, accessible to your visitors. Locking down a top-notch hosting service is pivotal for your website’s optimum performance.
Remember, you’d want a hosting service that’s swift in troubleshooting any glitches. And if you’ve got global ambitions for your online presence, a hosting service with servers sprinkled across various world regions is a good bet.
Marrying Your Hosting Service with Your Domain
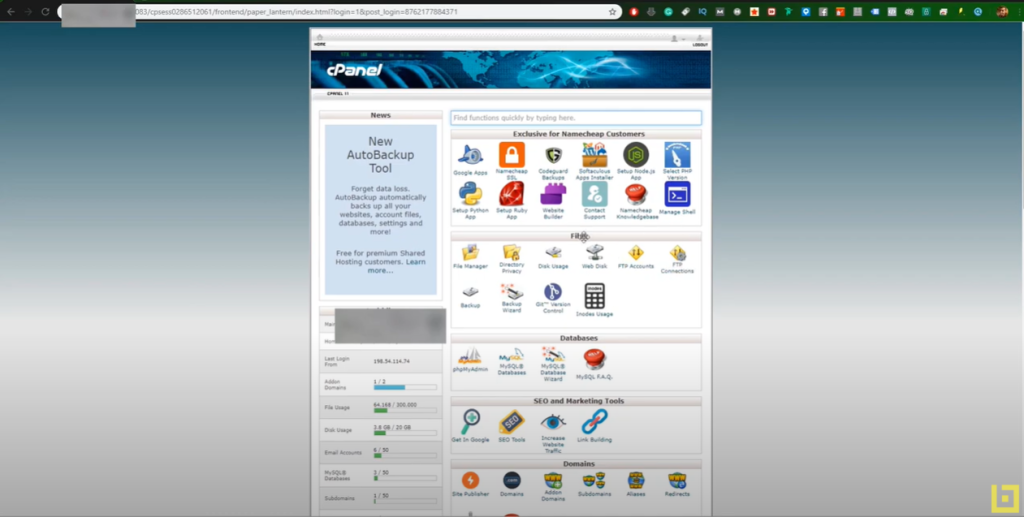
Once the hosting service gets your nod, the next step is to mesh it with your domain. Though this process might vary depending on the hosting provider, it generally circles around adding your domain to the hosting service’s control panel.
Fortifying Your Website’s Security
While it’s the concluding step, bolstering your website’s security is in no way lesser in significance. A must-have is the SSL certificate, which encrypts the channel between your website and its patrons. This not only serves as an added armor for your users but also ramps up their trust quotient in your website.
In a nutshell, while the idea of setting up hosting and integrating it with a domain might seem like scaling Everest, it’s quite straightforward with a meticulous approach. And the payback? A robust online presence that not only represents but also protects.
Securing with SSL and Leveraging Cloudflare CDN
After pinpointing the right name for your website and clinching your online domain, the next pivotal move in forging a robust online presence is settling on an apt web hosting solution. Picking the right web hosting isn’t merely a tech call but a strategic one with significant repercussions on your website’s performance and security.
One avenue you might explore is harnessing the service from your web hosting company if it’s on offer. The lion’s share of web hosting firms streamlines this process for you. Should you hit a snag, their support crew is ever-ready to bail you out.
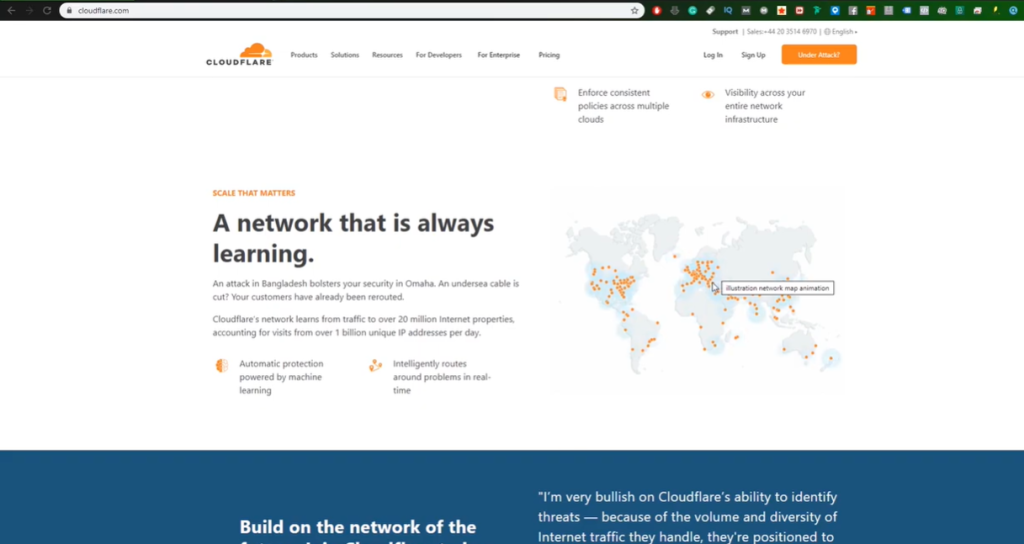
But, if you’re keen on turbocharging your website on a global scale, especially if you’re eyeing selling goods or services beyond Romania’s shores, a Content Delivery Network (CDN) is your ticket. And leading the CDN brigade is Cloudflare.
What makes Cloudflare tick? It mirrors a version of your website across its global servers. This means irrespective of where your visitors are logging in from, they’ll get the fastest version of your site from the server closest to them, supercharging your page load speeds. The icing on the cake? Cloudflare layers in added security by fending off DDOS assaults and deploying a shared SSL certificate.
Taking Cloudflare out for a spin is straightforward. Kick things off by creating an account and zeroing in on the website you wish to supercharge with the CDN. The entire operation unfurls within Cloudflare’s platform. And if you’re craving assistance, they’ve got you covered with video tutorials, in-depth articles, and a nimble support squad.
To wrap things up, Cloudflare comes in all flavors and sizes. Their complimentary offering caters to fledgling or smaller sites. But, if you’re a bigger fish with specific needs, their premium packages have your name on them. In essence, with Cloudflare, you’re not only speeding up but also armoring up your online presence.
How to Set Up a Custom Email Address Using cPanel
Crafting a personalized touch in today’s digital business realm can set you apart. One effective method is by using a custom email address associated with your domain. Let’s dive into the steps on how you can set this up using cPanel.
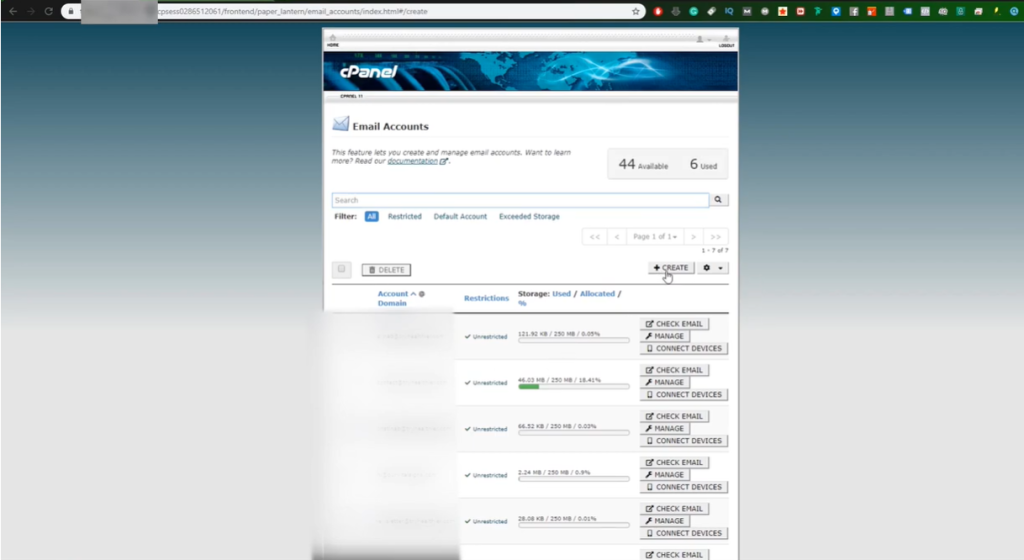
- Accessing cPanel: Start by logging into your cPanel dashboard. Once in, search for the “Email” option to commence the process.
- Creation Phase: Within the “Email” section, you’ll spot an option labeled “Create” . Click on it to proceed.
- Domain Selection & Email Naming: Once redirected, choose your desired domain from the list, for instance, ‘epicbird.ro’. Now, decide on the prefix of your email – this could be anything from ‘contact@’ to ‘hi@’.
- Password Setting: You’ll then be prompted to set a password for your new email account. You can either create one manually or opt for an auto-generated password, based on your security preference.
- Storage Allocation: Here, you’ll decide on the storage capacity for your email. Specify a fixed amount or go for unlimited storage if you foresee high email traffic.
- Configuration Instructions: Decide if you’d like the server to send you an email containing configuration instructions. This can be handy when setting up your email on various platforms like Outlook or mobile devices.
- Finalizing the Process: Once all preferences are set, simply click on “Create”.
- Verification: Post-creation, you can always verify and access your email through cPanel. Navigate to “Check Mail”. This directs you to a web-based email client where you can both send and receive emails.
- Integration with Other Platforms: If you’re inclined, you can integrate this email with other platforms, such as Gmail or Apple Mail, for streamlined access.
- Managing Your Email: cPanel provides extensive management tools. You can change passwords, adjust storage, temporarily disable, or even permanently delete your email account.
In essence, cPanel makes the creation and management of custom email addresses both simple and efficient. Now, with this guide, you have the know-how to bolster your professional presence with a custom email tied to your domain.
How to Install WordPress and Essential Security Plugins
Creating a website can be both thrilling and challenging, especially if you’re a beginner. One of the most user-friendly platforms to kick-start your online journey is WordPress. Below is a step-by-step guide on how to install WordPress using two different methods.
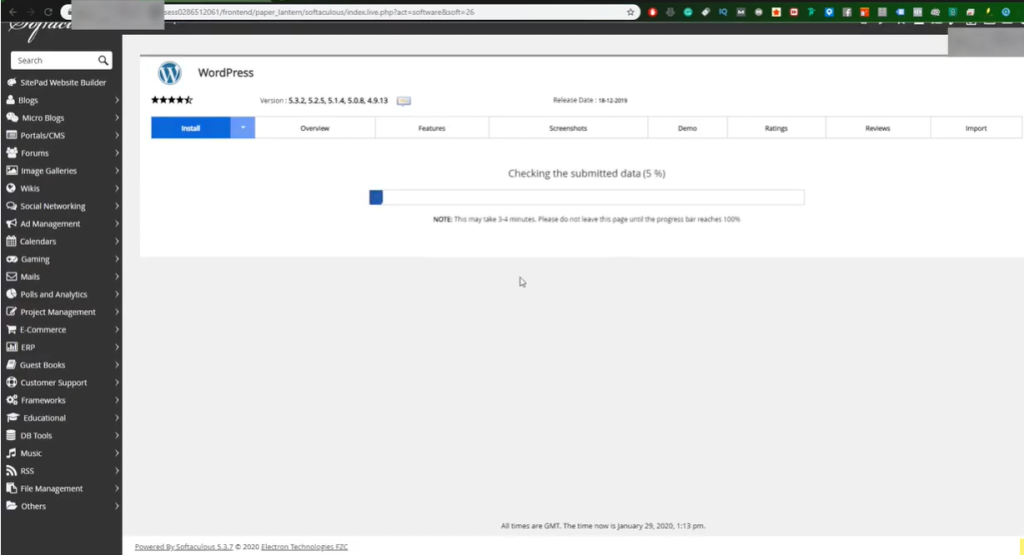
1. Installing WordPress via Softaculous in cPanel:
- Access cPanel: Log into your web hosting account and navigate to cPanel.
- Locate Softaculous: Within cPanel, search for the “Softaculous” or “WordPress” icon.
- Choose WordPress: Opt for the latest WordPress version to ensure you benefit from the most recent features and security updates.
- Select Domain and Directory: Specify the domain on which you’d like to install WordPress. Also, decide if you want it in a specific directory or the root (for example: yoursite.com or yoursite.com/blog).
- Admin Account Setup: Craft an administrator username and password. For enhanced security, avoid common names like “admin.”
- Email Configuration: Provide an admin email. This is essential, as WordPress will send updates and notifications to this address.
- Language Selection: If you’re aiming for a non-English site, adjust the language settings appropriately.
- Installation: Click “Install.” The Softaculous installer will handle the rest. Once done, you’ll receive a confirmation with links to your site and the WordPress dashboard.
2. Manual Installation of WordPress:
- Prepare the Ground: Before downloading WordPress, log into cPanel and access the File Manager.
- Choose Directory: Decide where you want WordPress. It could be the main directory or a sub-directory.
- Download WordPress: Head over to wordpress.org and fetch the latest version.
- Upload & Extract: Upload the downloaded ZIP file to your directory of choice in cPanel. Subsequently, extract the contents.
- Database Setup: Via cPanel, create a new database for WordPress. Remember to also create a user, granting them all privileges to the database.
- Run Installation: By entering your website URL in a browser, you’ll initiate the WordPress installation. Follow the on-screen instructions, providing the database details when prompted.
- Finalize Setup: Post database setup, you’ll be asked for site details, including the title, admin username, password, and email.
Securing Your WordPress Installation:
- Unique Login URL with Hide Login+: Common URLs are easy targets. This plugin lets you customize your login URL, adding an extra security layer.
- All-Around Protection with Wordfence Security: From firewall protection to malware scans, this plugin ensures your site remains impervious to common threats.
Conclusion: With WordPress installed, the sky’s the limit. Explore themes, plugins, and customizations to craft a site that mirrors your vision. Always keep security in mind, ensuring your site remains a safe space for you and your visitors.
How to Backup and Migrate Your Website: A Step-by-Step Guide
Managing a website comes with responsibilities. Among these, ensuring your website is backed up regularly stands paramount. Migration, another essential process, can come into play when shifting hosting providers. Let’s navigate through these processes.
1. Website Backup Process:
Frequency Matters: Depending on how often you update your website, backups should ideally be done daily, weekly, or at least monthly.
Backing up Files:
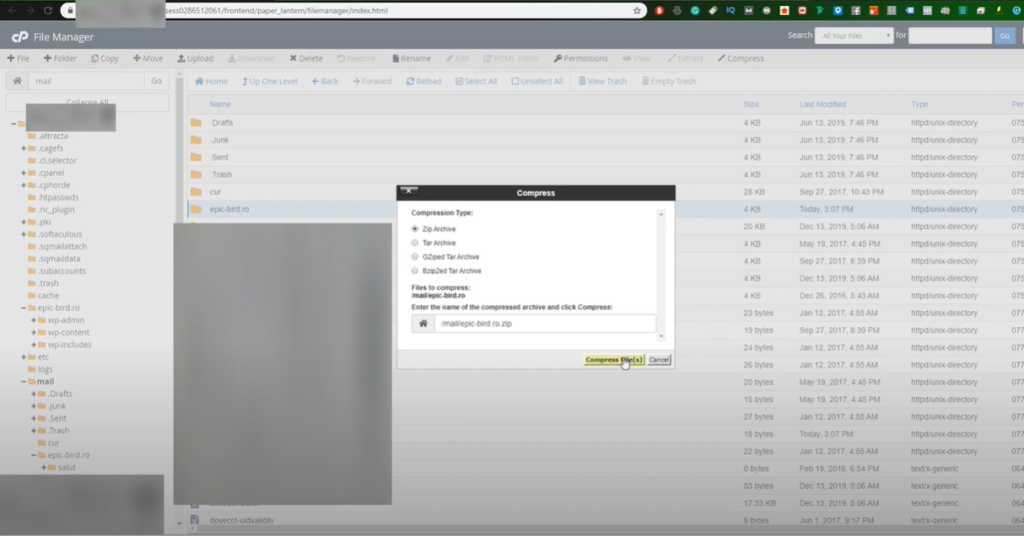
- Navigate to your website’s main directory (e.g., ‘epicbird.ro’).
- Select all files and compress them into a .zip file.
- Download the zipped file to your local computer.
Email Backup:
- Head to the email directory.
- As with website files, select all, compress, and download to your computer.
Database Backup:
- Access PHPMyAdmin.
- Select the appropriate database (e.g., ‘db_epicbird’).
- Click on ‘Export’ and then download the generated .sql file.
2. Website Migration Process:
Uploading Files to New Server:
- After getting your new hosting server ready, upload the previously backed-up .zip file.
- Extract the contents into the appropriate directory.
Database Setup:
- Create a new database on your new hosting server.
- Import the saved .sql file into this new database.
Update WordPress Configuration:
- Open the WordPress configuration file (wp-config.php).
- Adjust the database name, username, and password as per your new server details.
- Save and close the file.
Testing: Once all files and databases are in place, access your website to ensure everything runs smoothly on the new server.
Note: These processes, though seeming complex for beginners, are vital for your website’s longevity and security. Should you face any challenges, don’t hesitate to reach out to our Facebook community group or your hosting provider for assistance.
Introduction
Building a professional website using WordPress, combined with the power of Elementor and WooCommerce, can be a game-changer for your online presence.
1. Setting Up Your Website’s Identity
- Start by defining your website’s identity. This includes choosing a name, crafting a catchy slogan, and selecting a memorable favicon.
2. Crafting Essential Pages
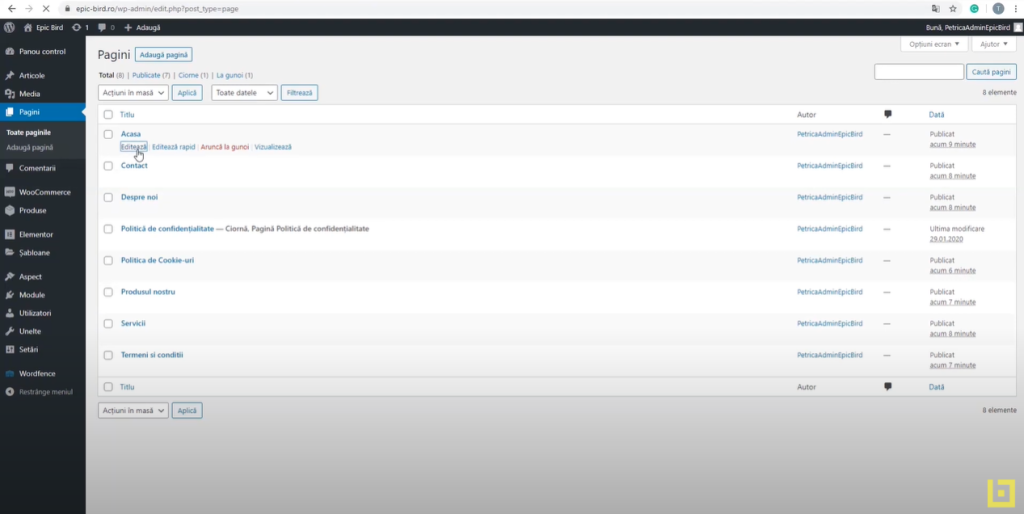
- Begin by creating the fundamental pages like “Home”, “About Us”, “Services”, “Contact”, and “Our Product”.
- A pro tip: Use the “Elementor Canvas” template. It empowers you to design content from scratch with Elementor, ensuring a unique look.
3. Structuring the Menu
- Organize your website’s menu based on your desired structure.
- Add the pages you’ve crafted to the menu and arrange them in your preferred order. If you wish, you can also incorporate custom links for a tailored navigation experience.
4. Designing with Elementor
- Elementor is your design playground. Whether you’re using the free version or the pro, you have a plethora of widgets at your disposal. Customize each page to resonate with your brand’s aesthetic.
5. Setting Up an Online Store with WooCommerce
- If e-commerce is on your radar, WooCommerce is your go-to plugin. Seamlessly integrate it to sell products on your site, enhancing its functionality.
Final Thoughts Always remember to save and publish the changes you make. This ensures that your updates are reflected on the live site. Depending on your specific needs, you might require additional plugins or tweaks in WordPress settings. However, this guide provides a robust starting point for anyone looking to establish a commanding online presence with WordPress, Elementor, and WooCommerce.
Creating a Stunning Website Header: Part I
Navigating the world of web design can be daunting, especially when it comes to creating a captivating header. But fear not! With a clear understanding of the interface and the right tools, you’ll be well on your way to crafting a header that truly stands out. Here’s a step-by-step guide to help you master this essential component of your website.
- Understanding the Interface:
- Your main workspace is akin to a canvas, a space where you can design and preview your content efficiently.
- Familiarize yourself with the various buttons and settings available. Through these settings, determine whether your page should go live or remain a draft.
- Adjust the look of individual elements and take note of default prices if applicable.
- Navigating Modules:
- Much like working in software applications such as Photoshop or Illustrator, you can toggle between modules you’ve crafted.
- An essential feature is the ability to revisit the history, allowing you to view past changes and revert to previous versions if mistakes were made.
- Embracing Responsiveness:
- For now, you might be working on a desktop-centric design. However, ensure your designs are responsive, adjusting well to different screen sizes.
- Personalizing Your Header:
- Your interface will typically consist of a main header. Within this space, you have the flexibility to customize various sections.
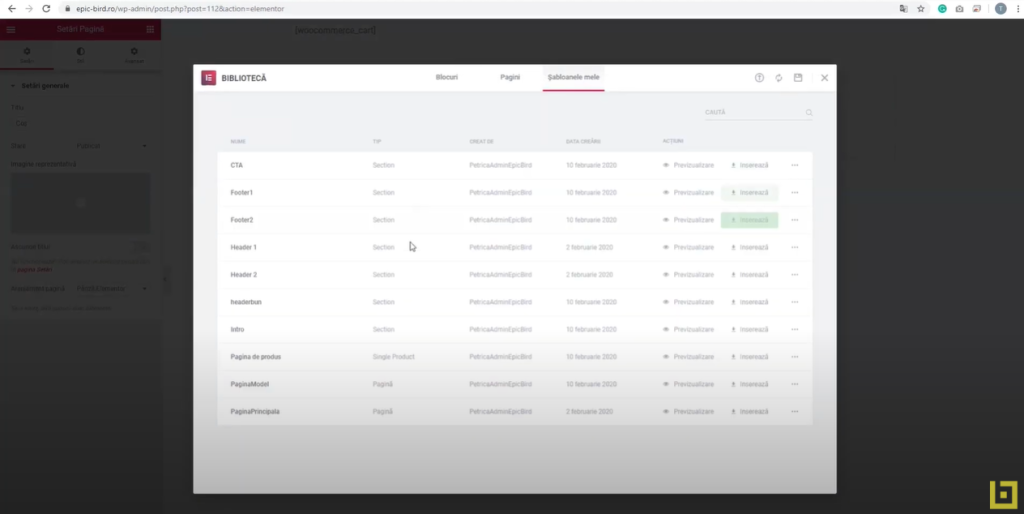
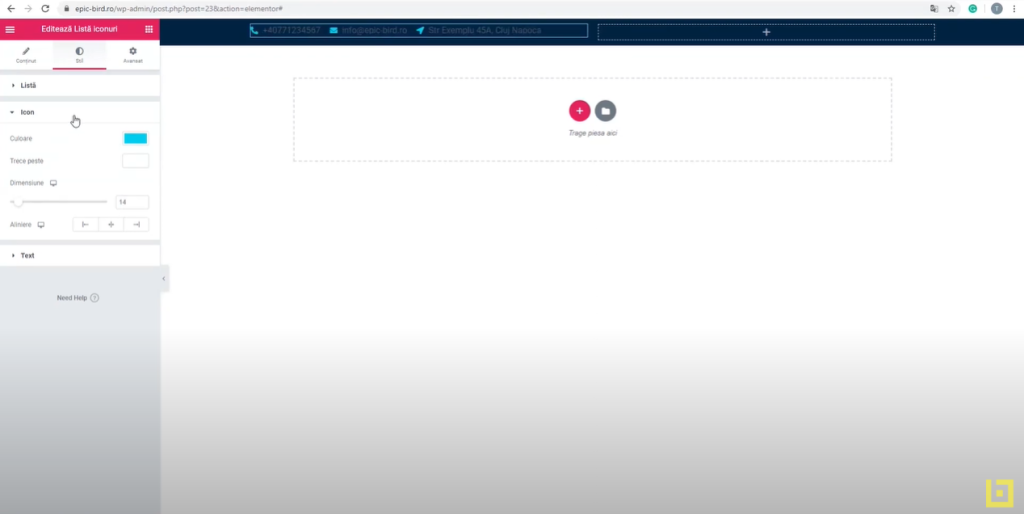
- Start with the navigation package: Feature contact details on the left and additional links on the right. Whether you’re crafting a new section or adding to an existing one, remember, these can be saved as templates for reuse!
- Design Elements:
- Maintain a unique, cohesive design throughout.
- Decide on the layout structure: Adjust content width, column gaps, and even determine the minimum height of sections.
- Spruce it up with background colors, fonts, and form separators. Tweak font size, weight, and alignment for readability and aesthetics.
- For added flair, incorporate lists with icons. Choose from a pre-existing library or upload your custom designs. Tailor the list style and pick colors that complement your brand.
- Consistency is Key:
- Ensure a visually cohesive experience by setting primary and secondary colors that reflect your brand. Adjust fonts and letter spacing to maintain design harmony.
- Review and Test:
- Once your designs are complete, update and preview how your page looks. It’s paramount to test the design’s interactivity to guarantee everything aligns perfectly.
To wrap up, the process might seem intricate at first, but with practice and a keen eye for detail, you’ll be creating stunning website headers in no time. Remember, consistency and testing are your best friends in this journey.
Designing the Perfect Header for Your Website: Part II
Crafting an attention-grabbing and functional website header goes beyond just aesthetics. It’s about structuring essential components in a manner that promotes user engagement and brand recognition. Let’s dive deeper into how to achieve this balance:
- Setting Dimensions and Adding Your Logo:
- Start by setting your content width to 1300 pixels to maintain uniformity throughout the page.
- When it’s logo time, pick the desired file from your media library and tweak its dimensions to fit seamlessly. Aligning your logo to the left can enhance visibility.
- Creating the Navigation Menu:
- With your logo in place, shift focus to constructing a navigation menu. Drag the ‘menu’ element to your preferred location and make the necessary customizations.
- Designate it as the primary menu, opting for a horizontal display. Enhance user experience by adjusting mouse-hover behaviors, like an underline or perhaps a subtle animation.
- Adding and Personalizing the Button:
- Incorporate a button next. Tailor it with the label “Request Quote” (or its equivalent) and program it to redirect users to a specific page upon clicking.
- For a symmetrical appeal, align the button to the right. Utilize style settings to refine the button’s typography and color scheme.
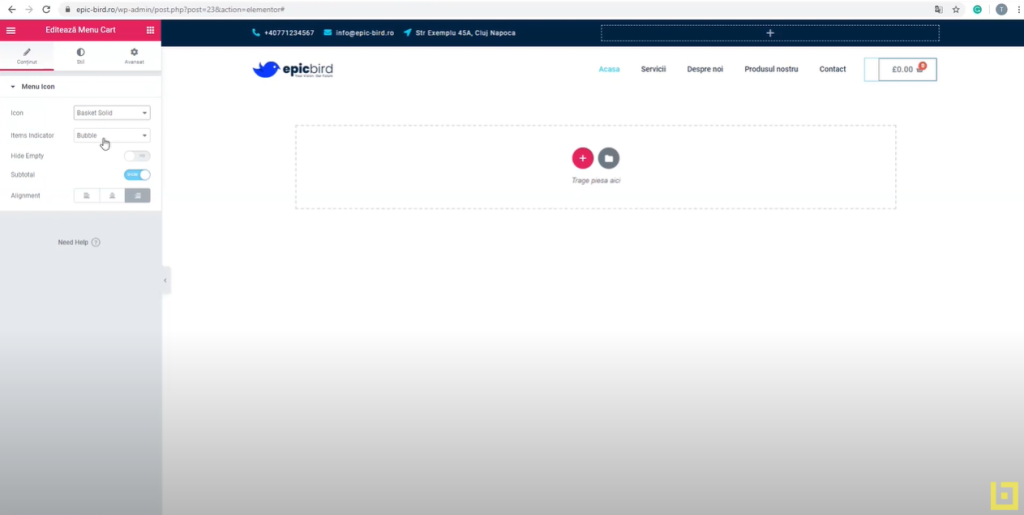
- Incorporating the Shopping Cart:
- Conclude with adding a shopping cart to your menu. Configure it to showcase the count of items in the cart and allow direct navigation to the checkout page.
- Final Touches:
- Ensuring all elements are in sync is crucial. Confirm that your header adapts beautifully across devices—responsive and aesthetically pleasing. Once satisfied, consider saving these configurations as a template. This can expedite design processes for other sections of your website.
By following these uncomplicated steps, you’ll craft a captivating and efficient header tailored for your website. Remember, it’s through such personalizations that you carve out a distinct online identity, setting you apart from the competition. Happy designing!
Crafting a Striking Hero Image for Your Website
Establishing a powerful first impression on your website can be pivotal, and this is where the “hero image” reigns supreme. Let’s journey through how to create an engaging hero section:
- Setting up the Hero Image:
- Start with column width adjustments, setting it to 1300 pixels and a top distance of 300 pixels.
- Navigate to the middle section’s style editing option to inject your chosen image. It’s essential to upload a web-optimized picture and earmark it as the section’s background. For dimensions, ensure it blankets the entire backdrop without repetitions, positioning it consistently at zero.
- Incorporating Title and Subtitle:
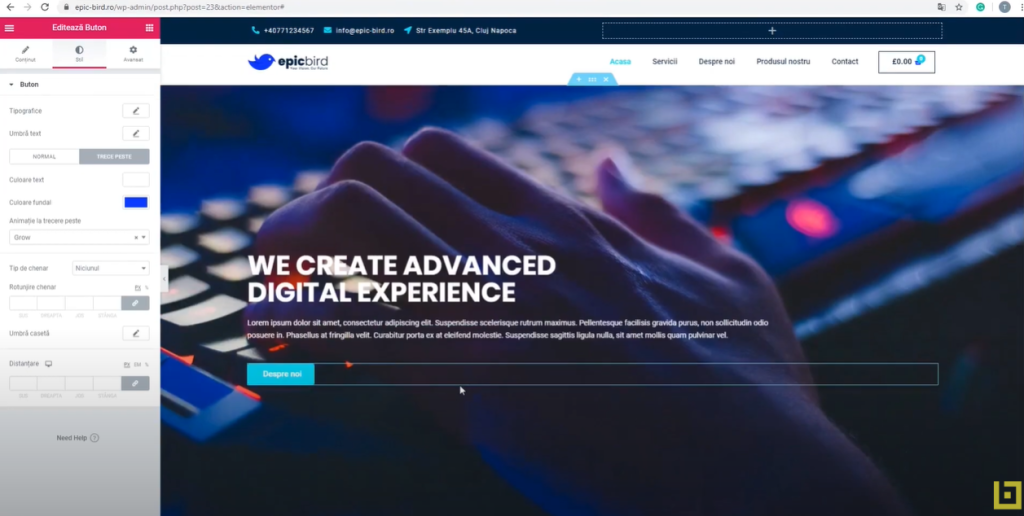
- These pivotal texts should ideally be center-aligned. Opt for a stark white for a standout style. Employing the main font from your brand’s style guide can offer cohesiveness. Consider a grander font size, say 50, for the title with a weightiness of 700. Introducing an entrance animation can infuse dynamism to your content.
- Button Creation:
- Nest a button below your descriptive text. This can be a pathway for users, directing them to pages like “About Us”. For styling, a standout background hue with white lettering can be compelling.
- Services Section Configuration:
- Kick off by laying out a structure divided into four columns. Each can be a representative of distinct services offered by your firm. Here, infuse boxes equipped with icons, headings, and explanatory text. Tailor each box, ensuring varied icons and descriptions to encapsulate each unique service.
- Wrap-up and Review:
- Post finalizing all the tweaks, it’s imperative to save and refresh the page. Scrutinize how it manifests on your website, making indispensable tweaks to ensure everything aligns with your vision.
These uncomplicated steps can aid in showcasing not just your services but resonating your brand’s persona through your website. With these tools at your disposal, you’re well on your way to creating a webpage that’s both a reflection of your services and an embodiment of your brand’s character.
Crafting an Impressive “About Us” Section for Your Website
Crafting an appealing “About Us” section might initially seem daunting, but it doesn’t have to be. With over a decade of copywriting experience under my belt, here’s a step-by-step guide to help you navigate this process smoothly:
- Establishing the Layout: Start by setting up a new section split into two columns. For a polished look, ensure a spacing of 100 pixels at the top and bottom. A width of 1300 pixels provides ample space for content without feeling cluttered.
- The Left Column: This is where your primary content goes.
- Begin with a compelling subtitle that grabs attention.
- Follow it up with the main text that conveys your message. Ensure the message resonates with your brand’s values and history.
- Introduce a call-to-action button. A quick tip: you can replicate an existing button from elsewhere on your site to maintain consistency and save time.
- The Right Column: Engage your visitors visually.
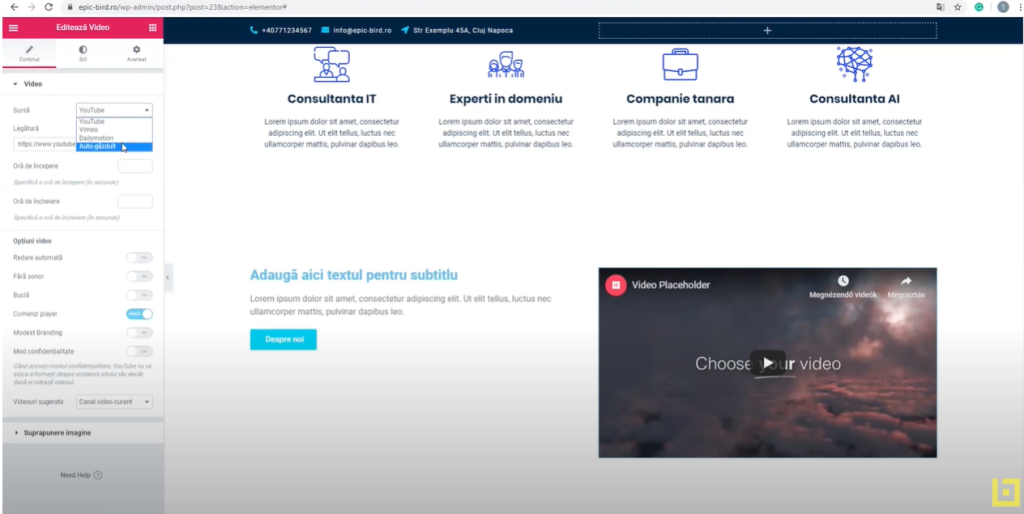
- Insert a video. It can be uploaded directly or sourced from popular platforms like YouTube or Vimeo. Videos offer a dynamic way to share your story.
- Below the video, place an image that complements the video and the overall theme. Make sure it fits seamlessly within the column.
- Typography Matters: Your section title should be clear and prominently visible. Opt for the “Poppins” font, sized at 40, with a font-weight of 700. For the body text, stick to a muted tone with the “Roboto” font to keep the design clean.
- Balancing the Content: To ensure a balanced layout between the left and right columns, maintain a 75-pixel spacing on the right side of the text column.
- Final Touches: To wrap up the section’s design, vertically center the content and choose a subtle grey background. This offers a neutral canvas that allows your content to shine.
- Adding a Dynamic Flare: Infuse some energy into the right column by applying a subtle animation effect, like “Lift”, which can enhance user engagement.
Remember, your “About Us” section is more than just information; it’s a reflection of your brand’s journey, values, and uniqueness. Craft it with care, and it will surely captivate your visitors.
Creating an Engaging Call-to-Action and a Well-Designed Footer
With over a decade of copywriting experience, I’ve come to understand the power of clear calls-to-action and the importance of a well-organized footer. Here’s a step-by-step guide to help you design these crucial sections for your website:
- Crafting a Call-to-Action (CTA):
- Start with a single-column section, giving it a width of 1300 pixels.
- Consistency is key: maintain a 100-pixel spacing at the top and bottom.
- Pick a distinct background color to make this section pop.
- Centralize a catchy subtitle.
- In the same column, pen down a compelling CTA message, like “Try our product and request a quote”.
- Add a button labeled “Request a Quote”, and apply a captivating animation to grab visitor attention.
- Designing the Footer:
- Initiate by setting the footer’s width to 1300 pixels and choose the background color used in the previous section.
- Settle for a 70-pixel spacing both above and below the content.
- Start with the first section: place your brand logo, aligning it to the left.
- In the next section, embed your site’s navigation. Choose a primary white color for a neat appearance.
- The third section should feature social media icons – think Facebook, Twitter, and YouTube. Ensure you link each icon to its respective social media page.
- Place a copyright text at the bottom. To the right of this, insert a “Created by [Your Name/Company]” text, along with links to your privacy policy and terms of use.
- Aim for vertical center alignment for all content within the footer.
- Finalizing:
- Update the page to ensure all your changes are saved.
Congratulations! You now have a captivating call-to-action and a comprehensive footer. Keep refining other parts of your webpage, and remember that user experience should always be a priority.
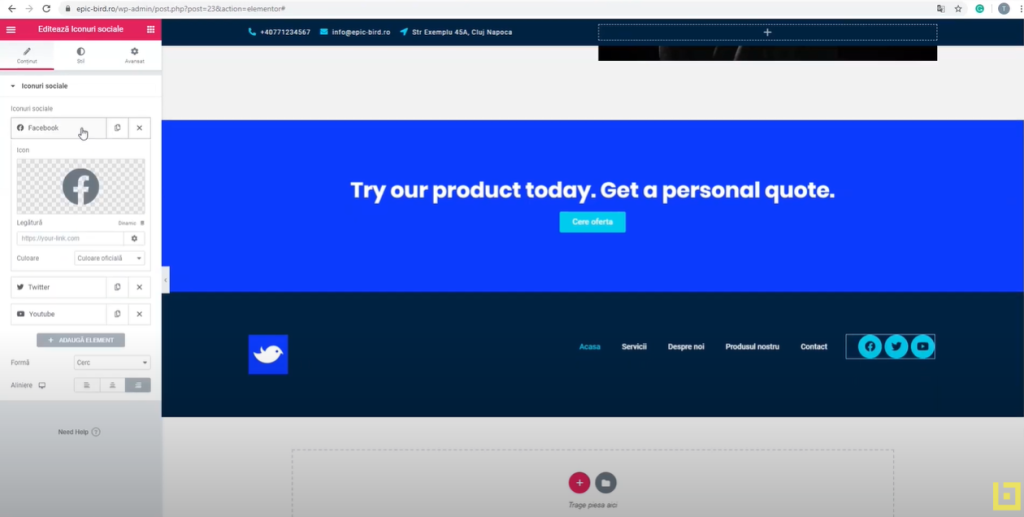
How to Craft an Effective ‘Services Page’ for Your Website
Creating a compelling ‘Services Page’ is essential for businesses wanting to showcase their offerings clearly and attractively. Let’s walk you through the steps:
- Layout and Organization:
- Initiate by mapping out the structure of your services page. Pinpoint the primary service categories and ponder on a lucid and consistent organization. Prioritize a clean, navigable presentation.
- Clear and Succinct Descriptions:
- Under each service category, pen a concise yet persuasive description. Maintain clarity in your language, shunning overly technical jargon. Spotlight the benefits and solutions you proffer to clients.
- Incorporate Relevant Visual Elements:
- Enhance your service descriptions with pertinent images or graphics. Deploy high-quality photos and illustrations to underline your services. Opt for imagery that exudes professionalism and grasps visitor attention.
- Highlight Your Competitive Edge:
- Emphasize the unique selling propositions (USPs) of your services. Delineate what sets you apart from rivals and why clients should opt for your offerings. Project aspects showcasing your provided value.
- Present Service Options and Packages:
- If you feature varied service options or packages, delineate them transparently. Craft comparative tables or listings spotlighting each package’s features and costs. Aid visitors in discerning the best fit for their needs.
- Incorporate Testimonials and Case Studies:
- Bolster trust in your services by introducing testimonials from satisfied clients or pertinent case studies. This strategy lets visitors perceive how you’ve aided others, fostering confidence in your capabilities.
- Embed a Contact Form or Clear CTA:
- Conclude your services page by facilitating visitor engagement. Integrate a contact form or lucid call-to-action guiding them to your contact page. Ensure your contact details are effortlessly locatable.
- Search Engine Optimization (SEO):
- Never neglect optimizing your services page for search engines. Incorporate pertinent keywords within titles, descriptions, and content. This boosts your visibility chances when potential clients scour online.
Remember, a well-structured ‘Services Page’ not only educates visitors but also influences their decision to engage. Dedicate time to its creation and witness a significant uptick in inquiries and conversions.
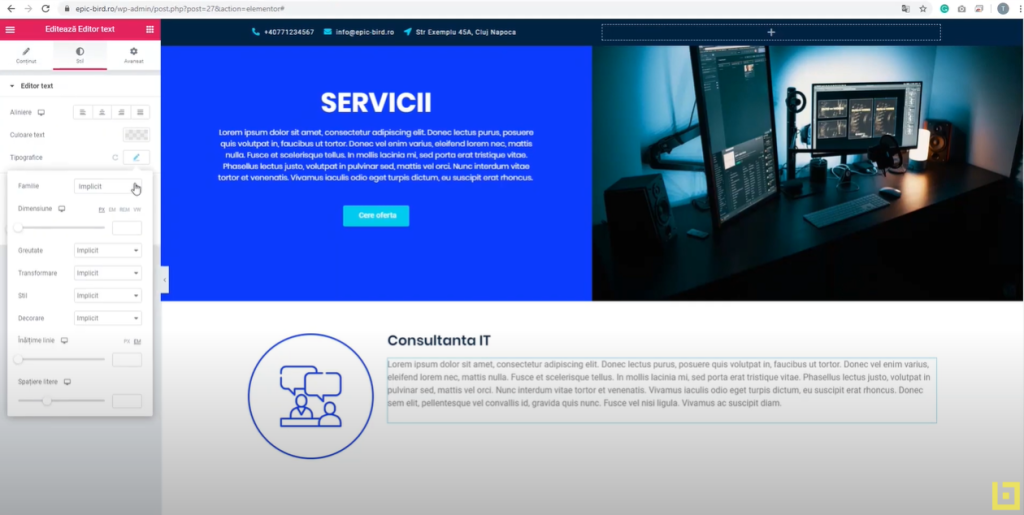
Crafting an Engaging ‘About Us’ Page for Your Website
Your ‘About Us’ page is a window into the soul of your business. Here’s a guide on how to make it resonate with visitors:
- Kick-off with a Story:
- Engage visitors by narrating the tale of how your company came to be. Share the passion and vision that underpin your enterprise. Ensure the story appeals to and aligns with your target audience.
- Introduce Your Team:
- Visitors often relish knowing who’s behind a business. Feature your team members, highlighting their skills and experiences. Adding photos can lend a personal and genuine touch to the page.
- Articulate Company Values:
- Define the core values guiding your business decisions and actions. Express them lucidly, ensuring they resonate with your company’s mission and vision.
- Spotlight Achievements and Experience:
- Briefly showcase your company’s significant achievements and relevant experiences, be it triumphant projects, vital partnerships, or awards secured. Highlight attributes underscoring your business’s quality and expertise.
- Incorporate Testimonials and Reviews:
- Endorsements from satisfied clients can robustly bolster trust and credibility. Embed testimonials and reviews to underscore your service quality and the satisfaction level of your clientele.
- Adopt a Friendly and Genuine Tone:
- Opt for a warm, authentic narrative. Sidestep overly formal or corporate language. Engage in a conversational tone, forging an emotional bond with your audience by showing them you understand their needs and aspirations.
- Leverage Appealing Visual Elements:
- Deploy top-tier images and graphics to buttress your narrative and grab visitor attention. Ensure they aptly mirror your company’s ethos and values.
- Encourage Engagement and Interaction:
- Conclude your ‘About Us’ page by making your contact details readily accessible. Spur visitors to engage by embedding a contact form or steering them to a detailed contact page.
Remember, an ‘About Us’ page isn’t just an informational section but a potent tool to narrate your brand story and connect emotionally with visitors.
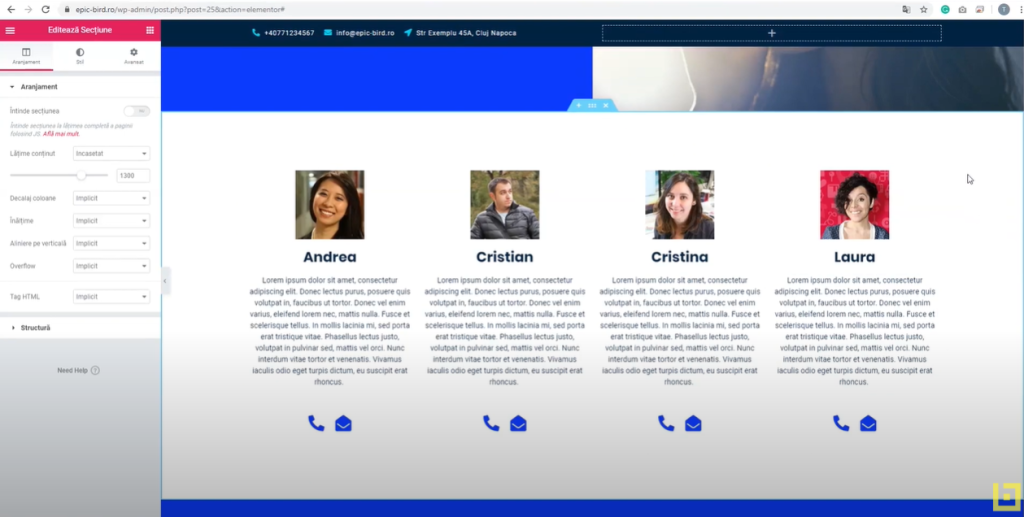
Creating an Effective “Contact” Page
Your “Contact” page is more than just a way for customers to get in touch. It’s an avenue to enhance trust, show professionalism, and provide reassurance. Here’s how to craft a compelling “Contact” page:
- Begin with a Warm Welcome:
- Start with a brief introduction, greeting visitors and emphasizing your availability for any questions or inquiries.
- Updated Contact Details:
- Ensure you provide up-to-date contact information, including your phone number, email address, and physical company address. This facilitates direct communication and displays transparency and professionalism.
- Contact Form:
- Feature an easily navigable contact form. Essential fields should include the name, email address, and message. You can further customize the form to ask for additional details like the phone number or message subject.
- Business Hours:
- If you operate within specific hours, display them clearly. This lets visitors know when they can reach out and when to expect a response.
- Map and Directions:
- For businesses with a physical location, embed an interactive map or provide clear directions. This aids visitors in finding your location and planning their visit accordingly.
- Prompt Responses:
- Aim to be efficient in replying to messages received. Clients appreciate swift responses, fostering trust in your services.
- Security and Confidentiality:
- Incorporate a statement addressing data protection and the confidentiality of the personal information visitors provide. This instills trust and complies with privacy standards.
- Regular Testing and Optimization:
- Periodically test the contact form functionality, ensuring messages are being appropriately received. Ensure that the page is optimized for all devices and loads swiftly.
By establishing an effective “Contact” page, you’ll simplify communication for your clients and provide a positive website experience. Prioritize availability, ensure timely responses, and keep your information up-to-date. By doing so, you’ll strengthen client relationships and carve out a robust online reputation.
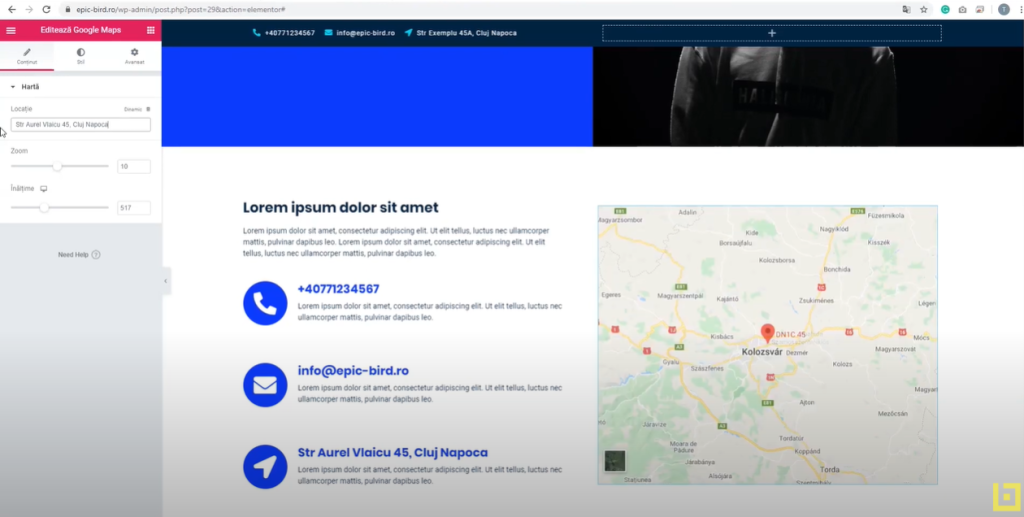
How to Set Up a Product Page with WooCommerce on WordPress
Creating a strong online presence demands a well-organized product page on your website. For anyone looking to achieve this using the WordPress platform, WooCommerce is the go-to plugin. With over a decade of copywriting experience, I’ve boiled down the essentials for you:
- Installing WooCommerce:
- WooCommerce is ideal for online stores with a moderate product range. For larger inventories, consider other solutions.
- Start by installing and activating WooCommerce on your WordPress site.
- Setting up WooCommerce:
- Post-installation, WooCommerce prompts you to finalize basic settings such as delivery address, company details, and preferred currency for payments.
- It’s crucial to set up payment options. While WooCommerce supports payments via PayPal and offline modes, those looking to accept credit card payments need to integrate a payment processor.
- Product Categories Creation:
- With WooCommerce installed, you can now establish product categories. This not only streamlines your product lineup but also enhances site navigation for your customers.
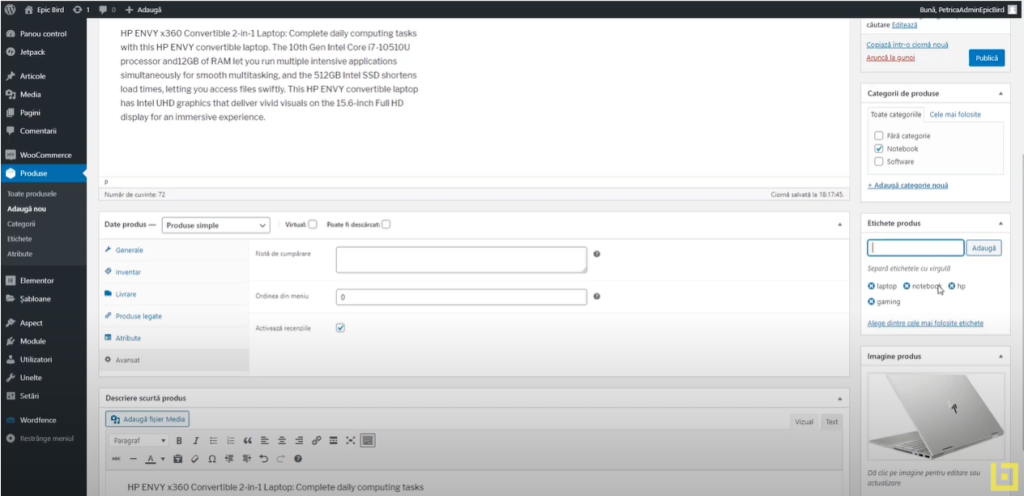
- Adding Products:
- Populate each category with products.
- Essential product details include its name, description, category, price, stock code, and shipping information. Don’t forget to tag products, as these tags boost search engine visibility.
- Image Settings for Products:
- Upload a primary image for every product.
- Enhance the product’s visual appeal by adding more images to its gallery.
- Product Publication:
- Once all details are in place, publish the product. You’ll end up with a neatly designed product page.
- Customizing the Page:
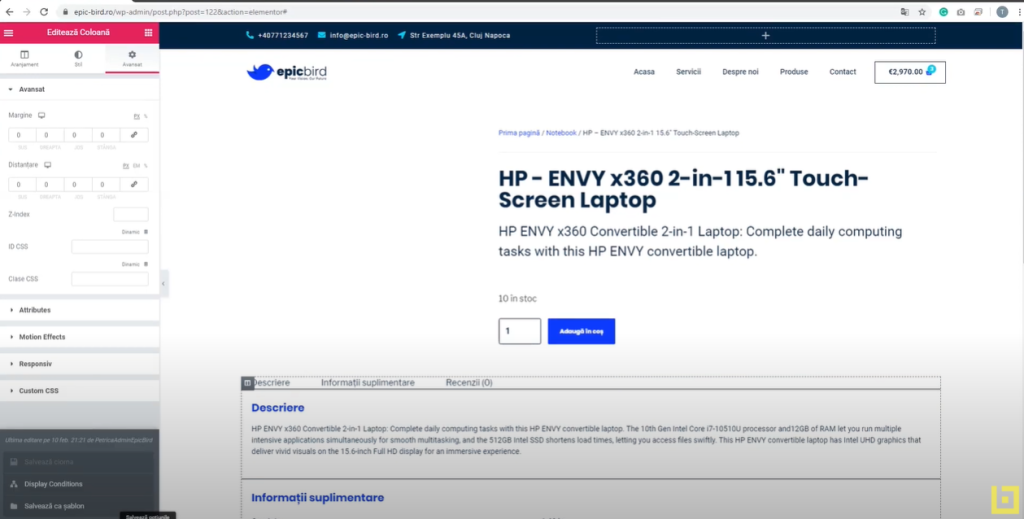
- Remember, the basic product page can be customized further. Tools like Elementor templates or other page-building plugins can be instrumental for this.
By following these steps, not only will you have a functional product page, but you’ll also offer an enhanced user experience, paving the way for potential sales. Always prioritize clarity and user-friendliness, ensuring that your website visitors find what they’re looking for effortlessly.
How to Create a Shop Page on Your Website
Building a well-structured shop page is fundamental for an online store. Here’s a comprehensive yet concise guide on how to craft the perfect product page for your website:
- Initiate Product Page Creation:
- Kick off by creating a fresh page; consider naming it “Products.” If you offer a variety of products, this will make organization a breeze.
- Use Elementor for Editing:
- Navigate to ‘Edit’, then choose “Edit with Elementor”. Your default setting should be on “Elementor Canvas”, as with other pages you’ve set up.
- Design Configuration:
- Start your page design using pre-saved templates. Feel free to modify the appearance by deleting columns, or by incorporating custom backgrounds and spacings.
- Product Inclusion:
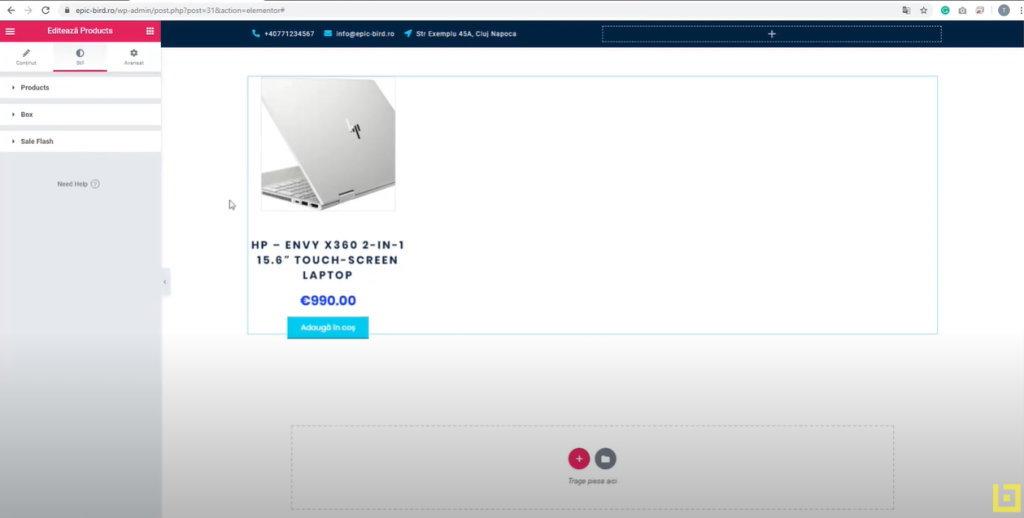
- Once you’re satisfied with the design, it’s time to populate the page with products. Craft a new section with a single column and determine its width. Within this column, insert the “WooCommerce Products” widget. This allows you to include your products, determining the number of products per row and the total number of rows.
- Tailor-making Product Design:
- Dive into the details of each product. You can modify the product’s image, title, price, and ‘Add to Cart’ button. Ensure each detail syncs up harmoniously with the page’s overarching design.
- Craft a Dynamic Template:
- Concluding your design phase, build a dynamic template. Applying this to all your products guarantees a consistent, professional appearance irrespective of the specific product a visitor clicks on.
- Update and Preview:
- With all configurations complete, refresh your page. Utilize the preview option to marvel at your new online shop’s aesthetics.
Do bear in mind, all these settings can be tweaked to mirror your individual needs and aesthetic leanings. With the potent combination of Elementor and WooCommerce, you’re in the driver’s seat, controlling every facet of your online shop’s look and functionality.
Leveraging Shortcodes in Elementor
With over a decade of copywriting experience, I’ve witnessed the dynamic evolution of web development tools. Among them, Elementor stands out as a powerful tool tailored for crafting and customizing websites, equipping users with a plethora of features. One feature that particularly piques my interest, and the focus of this guide, is the use of ‘shortcodes.’
What are Shortcodes?
At their core, shortcodes are concise snippets of code that can be effortlessly integrated into your website to add various functionalities. Imagine wanting to insert a button, showcase a carousel of images, or embed a contact form – shortcodes make all these possible without the fuss.
How to Use Shortcodes in Elementor?
- Acquire the Shortcode: Before you start, ensure you have the desired shortcode at your disposal.
- Integration with Elementor: Navigate to Elementor and add a text widget. Once done, input the shortcode into this widget.
- Transformation: Upon saving, this code will metamorphose into the designated element on your site.
Best Practices and Words of Wisdom
While Elementor and its shortcode feature streamline website customization, here are a couple of things to bear in mind:
- Know Before You Implement: Familiarize yourself with each shortcode’s purpose. By doing so, you guarantee your site remains optimized and runs seamlessly.
- Experiment and Evolve: Dive deep into the realm of shortcodes. As you experiment, you’ll unveil novel ways to enhance your website and proffer a unique user experience.
In conclusion, shortcodes are like magic spells – concise, yet profoundly transformative. Harness their limitless potential and watch your website flourish. As always, approach them with a keen sense of understanding and a zest for discovery.
Publishing Your Web Page
Over the course of my decade-long copywriting journey, I’ve witnessed countless ambitious individuals venture into the realm of website creation. If you’ve just wrapped up crafting the cornerstone pages of your site, like the homepage or webshop, you’re inches away from crossing the finish line. Here’s a distilled guide to refining and launching your website.
- Setting Your Primary Page:
- Objective: Ensure visitors land on your main page when they access your site.
- Action Steps: Head to “Appearance” and opt for “Customize.” From there, navigate to “Settings.” Within the primary page settings, select “Your Front Page Displays” and pick the “Static Page” choice. Cap it off by designating “Home” as your default landing page.
- Audit Your Redirects:
- Objective: Ensure seamless navigation by verifying all buttons and hyperlinks.
- Action Steps: Confirm that every button and link on your site leads to the correct pages. For instance, an “About Us” button should usher visitors to the “About Us” page, while your website logo should anchor them back to the homepage.
- Flesh Out Secondary Pages:
- Objective: Don’t let crucial secondary pages slip through the cracks.
- Action Steps: Pages like “Terms and Conditions” and “Cookie Policy” are indispensable. Craft them with ease by leveraging the template you used for your main pages.
In summation, while creating a website is no small feat, these final steps will ensure your hard work culminates in a polished and user-friendly site. So, buckle down, follow the guide, and make your digital vision come to life. Best of luck!
